 Alterar Idioma
A Interface Gráfica do Usuário
A Interface Gráfica do Usuário (GUI) oferece acesso a todos os recursos de gerenciamento de biblioteca e conversão de formato de e-books. O fluxo de trabalho básico para usar o calibre é primeiro adicionar livros à biblioteca a partir do seu disco rígido. O calibre tentará automaticamente ler os metadados dos livros e adicioná-los ao seu banco de dados interno. Uma vez que estejam no banco de dados, você pode executar várias ações neles que incluem conversão de um formato para outro, transferência para o dispositivo de leitura, visualização no computador e edição de metadados. Esta última inclui a modificação da capa, descrição e tags, entre outros detalhes. Observe que o calibre cria cópias dos arquivos que você adiciona a ele. Seus arquivos originais permanecem intocados.
A interface é dividida em várias seções:
Ações

A barra de ferramentas de ações fornece atalhos convenientes para ações usadas com frequência. Se você clicar com o botão direito do mouse nos botões, poderá executar variações na ação padrão. Observe que a barra de ferramentas de ações terá uma aparência ligeiramente diferente dependendo se você tem um leitor de e-books conectado ao seu computador.
Adicionar livros
 The Add books action has many variations accessed by doing a right-click on the button.
Adicionar livros de uma única pasta: Abre uma caixa de diálogo de seleção de arquivos e permite que você especifique quais livros em uma pasta devem ser adicionados. Esta ação é sensível ao contexto, ou seja, depende de qual catálogo você selecionou. Se você selecionou a Biblioteca, os livros serão adicionados à biblioteca. Se você selecionou o dispositivo leitor de e-books, os livros serão carregados no dispositivo e assim por diante.
Add books from folders and sub-folders: Allows you to choose a folder. The folder and all its sub-folders are scanned recursively, and any e-books found are added to the library. You can choose whether to have calibre add all files present in a single folder to a single book record or multiple book records. calibre assumes that each folder contains a single book. All e-book files in a folder are assumed to be the same book in different formats. This action is the inverse of the Save to disk action, i.e. you can Save to disk, delete the books and re-add them in single book per folder mode, with no lost information except for the date (this assumes you have not changed any of the settings for the Save to disk action).
Add multiple books from archive (ZIP/RAR/7z): Allows you to add multiple e-books that are stored inside the selected archive files. It is a convenient shortcut that avoids having to first unzip the archive and then add the books via add books from folders.
Adicionar livro vazio (entrada de livro sem formatos): Permite que você crie um registro de livro em branco. Isso pode ser usado para então preencher manualmente as informações sobre um livro que você ainda não possui em sua coleção.
Adicionar de ISBN: Permite que você adicione um ou mais livros através de seus códigos ISBN.
Adicionar arquivos aos registros de livros selecionados: Permite que você adicione ou atualize os arquivos associados a um livro existente em sua biblioteca.
Add files to selected book records from clipboard: Allows you to add or update the files associated with an existing book in your library from the current contents of the clipboard
Adicionar arquivos de dados aos registros de livros selecionados: Permite adicionar qualquer número de arquivos extras que serão armazenados em um subdiretório
datano diretório do livro. Consulte Adding extra data files to a book para obter detalhes.Adicionar um arquivo vazio aos registros de livros selecionados: Permite adicionar um arquivo vazio no formato especificado aos registros de livros selecionados.
A ação Adicionar livros pode ler metadados de uma ampla variedade de formatos de e-book. Além disso, ele tenta adivinhar os metadados a partir do nome do arquivo. Consulte a seção Adivinhando metadados a partir de nomes de arquivo para saber como configurar isso.
Para adicionar um formato adicional para um livro existente você pode fazer uma das três coisas:
Arraste e solte o arquivo no painel Detalhes do livro no lado direito da janela principal
Clique com o botão direito do mouse no botão Adicionar livros e escolha Adicionar arquivos aos livros selecionados.
Clique no botão Adicionar livros na área superior direita da caixa de diálogo Editar metadados, acessada pela ação Editar metadados.
Editar metadados
 The Edit metadata action has many variations which can be accessed by doing a right-click on the button.
Editar metadados individualmente: Permite editar os metadados dos livros um por um com a opção de buscar metadados, incluindo capas, da Internet. Também permite adicionar ou remover formatos específicos de e-book de um livro.
Editar metadados em massa: Permite editar campos de metadados comuns para um grande número de livros simultaneamente. Ele opera em todos os livros que você selecionou na Visualização da biblioteca.
Baixar metadados e capas: Baixa metadados e capas (se disponíveis) para os livros que estão selecionados na lista de livros.
Copy metadata: Copy metadata for the current book onto the system clipboard
Paste metadata: Paste metadata from the system clipboard onto the currently selected books
Mesclar registros de livros: Dá a você a capacidade de mesclar os metadados e formatos de dois ou mais registros de livros. Você pode optar em excluir ou manter os registros que não foram clicados primeiro.
Gerenciar arquivos de dados: Gerencia os arquivos de dados extras associados aos livros selecionados.
Para mais detalhes, consulte metadados.
Converter livros
 E-books podem ser convertidos de vários formatos para qualquer formato que seu leitor de e-books preferir. Muitos e-books disponíveis para compra estarão protegidos pela tecnologia Gerenciamento de Direitos Digitais (DRM). O calibre não converterá esses e-books. É fácil remover o DRM de muitos formatos, mas como isso pode ser ilegal, você terá que encontrar ferramentas para liberar seus livros por conta própria e entãousar o calibre para convertê-los.
Para a maioria das pessoas, a conversão deve ser um procedimento simples de um clique. Se você quiser saber mais sobre o processo de conversão, consulte conversão.
A ação Converter livros possui três variações, acessadas clicando com o botão direito do mouse no botão.
Converter individualmente: Permite que você especifique opções de conversão para personalizar a conversão de cada e-book selecionado.
Converter em massa: Permite que você especifique opções apenas uma vez para converter vários e-books em massa.
Criar um catálogo dos livros em sua biblioteca do calibre: Permite gerar uma lista completa dos livros em sua biblioteca, incluindo todos os metadados, em vários formatos, como XML, CSV, BiBTeX, EPUB e MOBI. O catálogo conterá todos os livros atualmente exibidos na visualização da biblioteca. Isso permite que você use os recursos de pesquisa para limitar os livros a serem catalogados. Além disso, se você selecionar vários livros usando o mouse, apenas esses livros serão adicionados ao catálogo. Se você gerar o catálogo em um formato de e-book como EPUB, MOBI ou AZW3, na próxima vez que você conectar seu leitor de e-books, o catálogo será enviado automaticamente para o dispositivo. Para obter mais informações sobre como os catálogos funcionam, leia Criar catálogos AZW3 • EPUB • MOBI.
Visualizar
 A ação Visualizar exibe o livro em um programa visualizador de e-books. O calibre possui um visualizador integrado para muitos formatos de e-book. Para outros formatos, ele usa o aplicativo padrão do sistema operacional. Você pode configurar quais formatos devem ser abertos com o visualizador interno por meio de Preferências → Interface → Comportamento. Se um livro tiver mais de um formato, você pode visualizar um formato específico clicando com o botão direito do mouse no botão.
Enviar para o dispositivo
 A ação Enviar para o dispositivo tem oito variações, podendo serem acessadas clicando com o botão direito do mouse no botão.
Enviar para a memória principal: Os livros selecionados são transferidos para a memória principal do leitor de e-books.
Enviar para o cartão (A): Os livros selecionados são transferidos para o cartão de armazenamento (A) no leitor de e-books.
Enviar para o cartão (B): Os livros selecionados são transferidos para o cartão de armazenamento (B) no leitor de e-books.
Enviar formato específico para: Os livros selecionados são transferidos para o local de armazenamento selecionado no dispositivo, no formato especificado por você.
Ejetar dispositivo: Desconecta o dispositivo do calibre.
Definir ação padrão de envio para o dispositivo: Permite que você especifique qual das opções, de 1 a 5 acima ou 7 abaixo, será a ação padrão quando você clicar no botão principal.
Enviar e excluir da biblioteca: Os livros selecionados são transferidos para o local de armazenamento selecionado no dispositivo e então excluídos da biblioteca.
Buscar Anotações (experimental): Transfere anotações que você possa ter feito em um e-book em seu dispositivo para os metadados de comentários do livro na biblioteca calibre.
Você pode controlar o nome do arquivo e a estrutura de pastas dos arquivos enviados para o dispositivo configurando um modelo em Preferências → Importar/exportar → Enviar livros para dispositivos. Consulte também A linguagem padrão do calibre.
Obter notícias
 A ação Baixar notícias baixa notícias de vários sites da Web e as converte em um e-book que pode ser lido em seu leitor de e-books. Normalmente, o e-book recém-criado é adicionado à sua biblioteca de e-books, mas se um leitor de e-books estiver conectado no momento em que o download for concluído, as notícias também serão carregadas no leitor automaticamente.
A ação Baixar notícias usa receitas simples (10-15 linhas de código) para cada site de notícias. Para saber como criar receitas para suas próprias fontes de notícias, consulte notícias.
A ação Baixar notícias possui três variações, acessadas clicando com o botão direito do mouse no botão.
Agendar download de notícias: Permite agendar o download das fontes de notícias selecionadas de uma lista de centenas disponíveis. O agendamento pode ser definido individualmente para cada fonte de notícias que você selecionar e o agendamento é flexível, permitindo que você selecione dias específicos da semana ou uma frequência de dias entre os downloads.
Adicionar uma fonte de notícias personalizada: Permite que você crie uma receita simples para baixar notícias de um site de notícias personalizado que você deseja acessar. Criar a receita pode ser tão simples quanto especificar um URL de feed de notícias RSS, ou você pode ser mais prescritivo criando um código baseado em Python para a tarefa. Para obter mais informações, consulte notícias.
Baixar todas as fontes de notícias agendadas: Faz com que o calibre comece imediatamente a baixar todas as fontes de notícias que você agendou.
Biblioteca
 A ação Biblioteca permite criar, alternar entre, renomear ou remover uma biblioteca. O calibre permite que você crie quantas bibliotecas desejar. Você pode, por exemplo, criar uma biblioteca de ficção, uma biblioteca de não-ficção, uma biblioteca de língua estrangeira, uma biblioteca de projetos ou qualquer estrutura que atenda às suas necessidades. As bibliotecas são a mais alta estrutura organizacional dentro do calibre. Cada biblioteca possui seu próprio conjunto de livros, tags, categorias e local de armazenamento base.
Alternar/criar biblioteca…: Permite que você; a) conecte-se a uma biblioteca do calibre pré-existente em outro local, b) crie uma biblioteca vazia em um novo local ou, c) mova a biblioteca atual para um local recém-especificado.
Troca rápida: Permite alternar entre bibliotecas que foram registradas ou criadas no calibre.
Renomear biblioteca: Permite renomear uma biblioteca.
Escolher um livro aleatório: Escolhe um livro aleatório na biblioteca para você
Remover biblioteca: Permite que você cancele o registro de uma biblioteca do calibre.
Exportar/importar todos os dados do calibre: Permite exportar dados do calibre para migrar para um novo computador ou importar dados exportados anteriormente.
<nome da biblioteca>: As ações 7, 8 etc… fornecem acesso de troca imediata entre várias bibliotecas que você criou ou conectou. Esta lista contém apenas as 5 bibliotecas usadas com mais frequência. Para a lista completa, use o menu Troca rápida.
Manutenção da biblioteca: Permite verificar a biblioteca atual em busca de problemas de consistência de dados e restaurar o banco de dados da biblioteca atual a partir de backups.
Nota
Os metadados sobre seus e-books, por exemplo, título, autor e tags, são armazenados em um único arquivo na pasta da biblioteca calibre chamado metadata.db. Se este arquivo for corrompido (um evento muito raro), você pode perder os metadados. Felizmente, o calibre faz backup automaticamente dos metadados de cada livro individual na pasta do livro como um arquivo OPF. Usando a ação Restaurar banco de dados em Manutenção da biblioteca descrita acima, você pode fazer com que o calibre reconstrua o arquivo metadata.db a partir dos arquivos OPF individuais para você.
Você pode copiar ou mover livros entre bibliotecas diferentes (depois de configurar mais de uma biblioteca) clicando com o botão direito do mouse no livro e selecionando a ação Copiar para a biblioteca.
Dispositivo
 A ação Dispositivo permite que você visualize os livros na memória principal ou nos cartões de armazenamento do seu dispositivo, ou para ejetar o dispositivo (desconectá-lo do calibre). Este ícone aparece automaticamente na barra de ferramentas principal do calibre quando você conecta um dispositivo compatível. Você pode clicar nele para ver os livros em seu dispositivo. Você também pode arrastar e soltar livros da sua biblioteca calibre no ícone para transferi-los para o seu dispositivo. Por outro lado, você pode arrastar e soltar livros do seu dispositivo no ícone da biblioteca na barra de ferramentas para transferir livros do seu dispositivo para a biblioteca calibre.
Salvar no disco
 A ação Salvar no disco tem cinco variações, acessadas clicando com o botão direito do mouse no botão.
Salvar no disco: Salva os livros selecionados no disco organizados em pastas. A estrutura da pasta é semelhante a:
Author_(sort)
    Title
        Book Files
Você pode controlar o nome do arquivo e a estrutura de pastas dos arquivos salvos no disco configurando um modelo em Preferências → Importar/exportar → Salvar livros no disco. Consulte também A linguagem padrão do calibre.
Salvar no disco em uma única pasta: Salva os livros selecionados no disco em uma única pasta.
Para 1. e 2., todos os formatos disponíveis, bem como os metadados, são armazenados no disco para cada livro selecionado. Os metadados são armazenados em um arquivo OPF. Os livros salvos podem ser reimportados para a biblioteca sem qualquer perda de informação usando a ação Adicionar livros.
Salvar apenas o formato *<seu preferido>* no disco: Salva os livros selecionados no disco na estrutura de pastas mostrada em (1.), mas apenas no formato de e-book de sua preferência. Você pode definir seu formato preferido em Preferências → Interface → Comportamento → Formato de saída preferido
Salvar apenas o formato *<seu preferido>* no disco em uma única pasta: Salva os livros selecionados no disco em uma única pasta, mas apenas no formato de e-book de sua preferência. Você pode definir seu formato preferido em Preferências → Interface → Comportamento → Formato de saída preferido
Salvar formato único no disco…: Salva os livros selecionados no disco na estrutura de pastas mostrada em (1.), mas apenas no formato que você selecionar na lista pop-up.
Conectar/compartilhar
 A ação Conectar/compartilhar permite que você se conecte manualmente a um dispositivo ou pasta em seu computador. Também permite configurar sua biblioteca calibre para acesso por meio de um navegador da Web ou e-mail.
A ação Conectar/compartilhar tem quatro variações, acessadas clicando com o botão direito do mouse no botão.
Conectar à pasta: Permite que você se conecte a qualquer pasta em seu computador como se fosse um dispositivo e use todos os recursos que o calibre tem para dispositivos com essa pasta. Útil se o seu dispositivo não puder ser suportado pelo calibre, mas estiver disponível como um disco USB.
Iniciar servidor de conteúdo: Inicia o servidor da Web integrado do calibre. Quando iniciado, sua biblioteca calibre estará acessível por meio de um navegador da Web a partir da Internet (se você escolher). Você pode configurar como o servidor da Web é acessado definindo as preferências em Preferências → Compartilhamento → Compartilhamento pela rede
Configurar compartilhamento de livros por e-mail: Permite o compartilhamento de livros e feeds de notícias por e-mail. Depois de configurar os endereços de e-mail para esta opção, o calibre enviará atualizações de notícias e livros para os endereços de e-mail inseridos. Você pode configurar como o calibre envia e-mail definindo as preferências em Preferências → Compartilhamento → Compartilhamento de livros por e-mail. Depois de configurar um ou mais endereços de e-mail, esta entrada de menu será substituída por entradas de menu para enviar livros para os endereços de e-mail configurados.
Remover livros
 A ação Remover livros exclui livros permanentemente, portanto, use-a com cuidado. É sensível ao contexto, ou seja, depende de qual catálogo você selecionou. Se você selecionou a Biblioteca, os livros serão removidos da biblioteca. Se você selecionou o dispositivo leitor de e-books, os livros serão removidos do dispositivo. Para remover apenas um formato específico para um determinado livro, use a ação Editar metadados. Remover livros também tem cinco variações que podem ser acessadas clicando com o botão direito do mouse no botão.
Remover livros selecionados: Permite que você exclua permanentemente todos os livros que estão selecionados na lista de livros.
Remover arquivos de um formato específico de livros selecionados…: Permite que você exclua permanentemente arquivos de e-book de um formato especificado dos livros que estão selecionados na lista de livros.
Remover todos os formatos de livros selecionados, exceto…: Permite que você exclua permanentemente arquivos de e-book de qualquer formato, exceto um formato especificado, dos livros que estão selecionados na lista de livros.
Remover todos os formatos de livros selecionados: Permite que você exclua permanentemente todos os arquivos de e-book dos livros que estão selecionados na lista de livros. Apenas os metadados serão mantidos.
Remover capas de livros selecionados: Permite que você exclua permanentemente os arquivos de imagem de capa dos livros que estão selecionados na lista de livros.
Remover livros correspondentes do dispositivo: Permite que você remova arquivos de e-book de um dispositivo conectado que correspondam aos livros que estão selecionados na lista de livros.
Restaurar excluídos recentemente: Permite desfazer a remoção de livros ou formatos.
Nota
Observe que quando você usa Remover livros para excluir livros da sua biblioteca calibre, o registro do livro é excluído, mas os livros são armazenados temporariamente, por alguns dias, em uma pasta de lixo. Você pode desfazer a exclusão clicando com o botão direito do mouse no botão Remover livros e escolhendo Restaurar excluídos recentemente.
Preferências
 A ação Preferências permite que você altere a maneira como vários aspectos do calibre funcionam. Possui quatro variações, acessadas clicando com o botão direito do mouse no botão.
Preferências: Permite que você altere a maneira como vários aspectos do calibre funcionam. Clicar no botão também executa esta ação.
Executar assistente de boas-vindas: Permite que você inicie o Assistente de boas-vindas que apareceu na primeira vez que você iniciou o calibre.
Obter plugins para aprimorar o calibre: Abre uma nova janela que mostra os plugins para o calibre. Esses plugins são desenvolvidos por terceiros para estender a funcionalidade do calibre.
Reiniciar em modo de depuração: Permite que você ative um modo de depuração que pode ajudar os desenvolvedores do calibre a resolver problemas encontrados no programa. Para a maioria dos usuários, isso deve permanecer desativado, a menos que seja instruído por um desenvolvedor a ativá-lo.
Catálogos
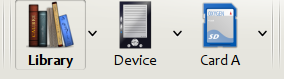
Um catálogo é uma coleção de livros. O calibre pode gerenciar dois tipos diferentes de catálogos:
Biblioteca: Esta é uma coleção de livros armazenados em sua biblioteca calibre em seu computador.
Dispositivo: Esta é uma coleção de livros armazenados em seu leitor de e-books. Ela estará disponível quando você conectar o leitor ao seu computador.
Muitas operações, como adicionar livros, excluir, visualizar, etc., são sensíveis ao contexto. Então, por exemplo, se você clicar no botão Visualizar quando tiver o catálogo Dispositivo selecionado, o calibre abrirá os arquivos no dispositivo para visualização. Se você tiver o catálogo Biblioteca selecionado, os arquivos em sua biblioteca calibre serão abertos.
Pesquisar e classificar
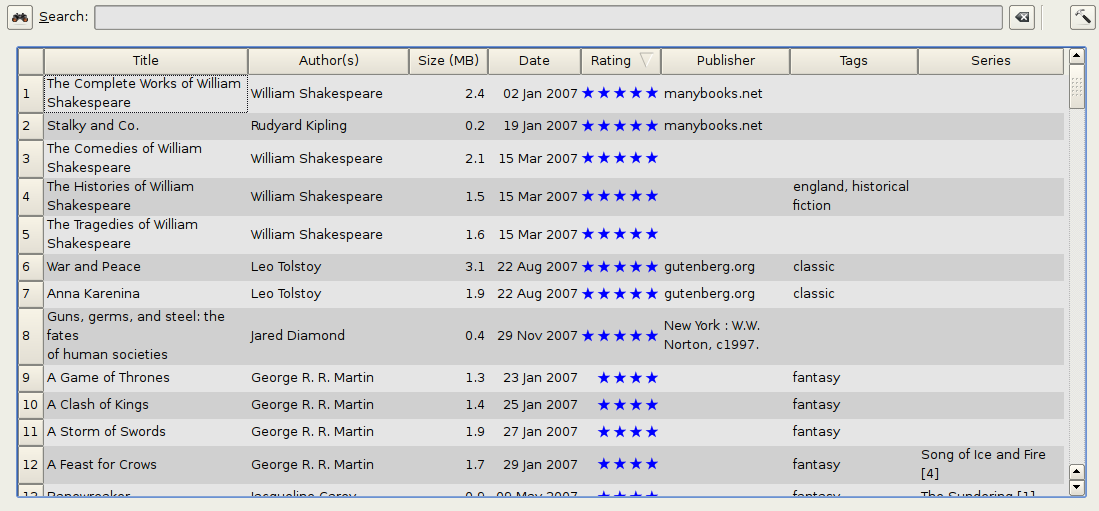
A seção Pesquisar e classificar permite que você execute várias ações poderosas em suas coleções de livros.
Você pode classificá-los por título, autor, data, classificação, etc. clicando nos títulos das colunas. Você também pode classificar subitens, ou seja, classificar em várias colunas. Por exemplo, se você clicar na coluna de título e depois na coluna de autor, o livro será classificado por autor e, em seguida, todas as entradas para o mesmo autor serão classificadas por título.
Você pode pesquisar um livro específico ou um conjunto de livros usando a barra de pesquisa. Mais sobre isso abaixo.
Você pode editar metadados de forma rápida e conveniente selecionando a entrada que deseja alterar na lista e pressionando a tecla E.
Você pode realizar ações em conjuntos de livros. Para selecionar vários livros, você pode:
Mantenha a tecla Ctrl pressionada e clique nos livros que deseja selecionar.
Mantenha a tecla Shift pressionada e clique no livro inicial e final de um intervalo de livros que deseja selecionar.
Você pode configurar quais campos deseja exibir usando a caixa de diálogo configuração.
Para executar a classificação secundária complexa baseada em várias colunas, adicione a ferramenta Classificar por a uma barra de ferramentas por meio de Preferências → Barras de ferramentas e menus.
A interface de pesquisa
Você pode pesquisar todos os metadados do livro inserindo termos de pesquisa na barra de pesquisa. Por exemplo:
Asimov Foundation format:lrf
Isso corresponderá a todos os livros em sua biblioteca que possuem Asimov e Foundation em seus metadados e estão disponíveis no formato LRF. Mais alguns exemplos:
author:Asimov and not series:Foundation
title:"The Ring" or "This book is about a ring"
format:epub publisher:feedbooks.com
Tipos de pesquisa
Existem quatro tipos de pesquisa: contém, igualdade, expressão regular (consulte expressões regulares) e variante de caractere. Você escolhe o tipo de pesquisa com um caractere de prefixo.
Pesquisas ‘Contém’
As pesquisas sem caractere de prefixo são contém e diferenciam maiúsculas de minúsculas por padrão. Um item corresponde se a string de pesquisa aparecer em qualquer lugar nos metadados indicados. Você pode tornar as pesquisas contém sensíveis a maiúsculas e minúsculas marcando a opção Pesquisa sensível a maiúsculas e minúsculas em Preferências / Pesquisa. Se a opção de pesquisa Caracteres sem acento correspondem a caracteres acentuados e a pontuação é ignorada estiver marcada, um caractere corresponderá a todas as suas variantes (por exemplo, e corresponde a é, è, ê e ë) e toda a pontuação e espaços em branco serão ignorados. Por exemplo, se a opção Caracteres sem acento correspondem… estiver marcada, então, dados os dois títulos de livros:
Grande, Incomodado e Mau
Grande Chatice
então essas pesquisas encontram:
title:"er"corresponde a ambos (‘e’ corresponde a ‘é’ e ‘e’).
title:"g "corresponde a ambos porque os espaços são ignorados.
title:"g,"corresponde a ambos porque a vírgula é ignorada.
title:"gb"corresponde a ambos porque ‘, ‘ é ignorado no livro 1 e os espaços são ignorados no livro 2.
title:"g b"corresponde a ambos porque a vírgula e o espaço são ignorados.
title:"db"corresponde a #1 porque o espaço em ‘e Mau’ é ignorado.
title:","corresponde a ambos (na verdade, corresponde a todos os livros) porque as vírgulas são ignoradas.
Se a opção Caracteres sem acento correspondem… não estiver marcada, as variantes de caracteres, pontuação e espaçamento serão significativas.
Você pode definir apenas uma das opções de pesquisa Pesquisa sensível a maiúsculas e minúsculas e Caracteres sem acento correspondem a caracteres acentuados e a pontuação é ignorada.
Pesquisas de ‘Igualdade’
As pesquisas de igualdade são indicadas prefixando a string de pesquisa com um sinal de igual (=). Por exemplo, a consulta tag:"=science" corresponderá a science, mas não a science fiction ou hard science. As variantes de caracteres são significativas: é não corresponde a e.
Duas variantes de pesquisas de igualdade são usadas para itens hierárquicos (por exemplo, A.B.C): pesquisas de prefixo hierárquico e pesquisas de componente hierárquico. A primeira, indicada por um único ponto após o sinal de igual (=.), corresponde às partes iniciais de um item hierárquico. A segunda, indicada por dois pontos após o sinal de igual (=..), corresponde a um nome interno no item hierárquico. Exemplos, usando a tag História.Militar.WWII como o valor:
tags:"=.História": Verdadeiro.Históriaé um prefixo da tag.
tags:"=.História.Militar": Verdadeiro.História.Militaré um prefixo da tag.
tags:"=.História.Militar.WWII": Verdadeiro.História.Militar.WWIIé um prefixo da tag, embora impróprio.
tags:"=.Militar": Falso.Militarnão é um prefixo da tag.
tags:"=.WWII": Falso.WWIInão é um prefixo da tag.
tags:"=..História": Verdadeiro. A hierarquia contém o valorHistória.
tags:"=..Militar": Verdadeiro. A hierarquia contém o valorMilitar.
tags:"=..WWII": Verdadeiro. A hierarquia contém o valorWWII.
tags:"=..Military.WWII": Falso. A pesquisa..procura valores únicos.
Pesquisas de ‘Expressão regular’
As pesquisas de expressão regular são indicadas prefixando a string de pesquisa com um til (~). Qualquer expressão regular compatível com Python pode ser usada. As barras invertidas usadas para escapar de caracteres especiais em expressões regulares devem ser duplicadas porque as barras invertidas simples serão removidas durante a análise da consulta. Por exemplo, para corresponder a um parêntese literal, você deve inserir \\( ou, alternativamente, usar super-aspas (veja abaixo). As pesquisas de expressão regular são pesquisas ‘contém’, a menos que a expressão seja ancorada. As variantes de caracteres são significativas: ~e não corresponde a é.
Pesquisas de ‘Variante de caractere’
As pesquisas de variante de caractere são indicadas prefixando a string de pesquisa com um acento circunflexo (^). Esta pesquisa é semelhante à pesquisa ‘contém’ (acima), exceto que:
maiúsculas e minúsculas são sempre ignoradas.
as variantes de caracteres sempre correspondem entre si.
pontuação e espaços em branco são sempre significativos.
As opções de pesquisa Caracteres sem acento correspondem a caracteres acentuados e a pontuação é ignorada e Pesquisa sensível a maiúsculas e minúsculas são ignoradas. Elas não têm efeito sobre o comportamento desta pesquisa.
O seguinte compara esta pesquisa a uma pesquisa contém, assumindo que a opção Caracteres sem acento correspondem… esteja marcada (veja acima), dados os mesmos dois títulos de livros:
Grande, Incomodado e Mau
Grande Chatice
então essas pesquisas de variante de caractere encontram:
title:"^er"corresponde a ambos (‘e’ corresponde a ‘é’ e ‘e’)
title:"^g"corresponde a ambos
title:"^g "corresponde a #2 porque o espaço é significativo
title:"^g,"corresponde a #1 porque a vírgula é significativa
title:"^gb"não corresponde a nada porque o espaço e a vírgula são significativos
title:"^g b"corresponde a #2 porque a vírgula é significativa
title:"^db"não corresponde a nada
title:"^,"corresponde a #1 (em vez de todos os livros) porque a vírgula é significativa
Sintaxe da expressão de pesquisa
Uma expressão de pesquisa é uma sequência de termos de pesquisa opcionalmente separados pelos operadores and e or. Se dois termos de pesquisa ocorrerem sem um operador de separação, and será assumido. O operador and tem prioridade sobre o operador or`; por exemplo, a expressão ``a or b and c é o mesmo que a or (b and c). Você pode usar parênteses para alterar a prioridade; por exemplo (a or b) and c para fazer o or ser avaliado antes do and. Você pode usar o operador not para negar (inverter) o resultado da avaliação de uma expressão de pesquisa. Exemplos:
not tag:fooencontra todos os livros que não contêm a tagfoo
not (author:Asimov or author:Weber)encontra todos os livros não escritos por Asimov ou Weber.
Os exemplos acima mostram exemplos de termos de pesquisa. Um termo de pesquisa básico é uma sequência de caracteres que não inclui espaços, aspas ("), barras invertidas (\) ou parênteses (( )). Pode ser opcionalmente precedido por um especificador de nome de coluna: o nome de pesquisa de uma coluna seguido por dois pontos (:), por exemplo author:Asimov. Se um termo de pesquisa deve conter um espaço, o termo inteiro deve ser colocado entre aspas, como em title:"O Anel". Se o termo de pesquisa deve conter aspas, elas devem ser ‘escapadas’ com barras invertidas. Por exemplo, para pesquisar uma série chamada A “Bola” e A “Cadeia”, use:
series:"The \"Ball\" and The \"Chain\"
Se você precisar de uma barra invertida real, algo que acontece frequentemente em pesquisas de expressão regular, use duas delas (\\).
Às vezes é difícil acertar todos os escapes para que o resultado seja o que você deseja, especialmente em pesquisas de expressão regular e modelo. Nesses casos, use a super-aspas: """sequência de caracteres""". Os caracteres entre super-aspas são usados sem alterações: nenhum processamento de escape é feito.
Mais Informações
Para pesquisar uma string que começa com um sinal de igual, til ou acento circunflexo; prefixe a string com uma barra invertida.
Coloque as strings de pesquisa entre aspas (”) se a string contiver parênteses ou espaços. Por exemplo, para encontrar livros com a tag Ficção Científica, você deve pesquisar por tag:"=ficção científica". Se você pesquisar por tag:=ficção científica, encontrará todos os livros com a tag ciência e a palavra ficção em qualquer metadado.
Você pode criar consultas de pesquisa avançada facilmente usando a caixa de diálogo Pesquisa avançada acessada clicando no botão  à esquerda da caixa de pesquisa.
Os campos disponíveis para pesquisa são: tag, title, author, publisher, series, series_index, rating, cover, comments, format, identifiers, date, pubdate, search, size, vl e colunas personalizadas. Se um dispositivo estiver conectado, o campo ondevice ficará disponível ao pesquisar na visualização da biblioteca calibre. Para encontrar o nome de pesquisa (na verdade chamado de nome de pesquisa) para uma coluna personalizada, passe o mouse sobre o cabeçalho da coluna na visualização da biblioteca.
Datas
A sintaxe para pesquisar datas é:
pubdate:>2000-1 Will find all books published after Jan, 2000
date:<=2000-1-3 Will find all books added to calibre before 3 Jan, 2000
pubdate:=2009 Will find all books published in 2009
Se a data for ambígua, a localidade atual será usada para comparação de datas. Por exemplo, em uma localidade mm/dd/aaaa, 02/01/2009 é interpretado como 01 de fevereiro de 2009. Em uma localidade dd/mm/aaaa, é interpretado como 02 de janeiro de 2009. Algumas strings de data especiais estão disponíveis. A string today se traduz na data de hoje, seja ela qual for. As strings yesterday e thismonth (ou o equivalente traduzido no idioma atual) também funcionam. Além disso, a string daysago (também traduzida) pode ser usada para comparar com uma data de alguns dias atrás. Por exemplo:
date:>10daysago
date:<=45daysago
Para evitar possíveis problemas com strings traduzidas ao usar uma versão não inglesa do calibre, as strings _today, _yesterday, _thismonth e _daysago estão sempre disponíveis. Elas não são traduzidas.
Pesquisando datas e valores numéricos com comparações relacionais
Datas e campos numéricos suportam os operadores relacionais = (igual a), > (maior que), >= (maior ou igual a), < (menor que), <= (menor ou igual a) e != (diferente de). Os campos de classificação são considerados numéricos. Por exemplo, a pesquisa rating:>=3 encontrará todos os livros classificados com 3 ou mais.
Você pode pesquisar livros que têm um formato de um determinado tamanho assim:
size:>1.1Mencontrará livros com um formato maior que 1,1 MB
size:<=1Kencontrará livros com um formato menor ou igual a 1 KB
Você pode pesquisar o número de itens em campos de vários valores, como tags, usando o caractere # e, em seguida, usando a mesma sintaxe dos campos numéricos. Por exemplo, para encontrar todos os livros com mais de 4 tags, use tags:#>4. Para encontrar todos os livros com exatamente 10 tags, use tags:#=10.
Índices de séries
Os índices de séries são pesquisáveis. Para a série padrão, o nome de pesquisa é series_index. Para colunas de séries personalizadas, use o nome de pesquisa da coluna seguido por _index. Por exemplo, para pesquisar os índices de uma coluna de série personalizada chamada #my_series, você usaria o nome de pesquisa #my_series_index. Os índices de séries são números, então você pode usar os operadores relacionais descritos acima.
Pesquisas salvas
O campo especial search é usado para pesquisas salvas. Se você salvar uma pesquisa com o nome Livros do meu cônjuge, poderá inserir search:"Livros do meu cônjuge" na barra de pesquisa para reutilizar a pesquisa salva. Mais sobre como salvar pesquisas abaixo.
Bibliotecas virtuais
O campo especial vl é usado para pesquisar livros em uma biblioteca virtual. Por exemplo, vl:Lidos encontrará todos os livros na biblioteca virtual Lidos. A pesquisa vl:Lidos and vl:"Ficção Científica" encontrará todos os livros que estão nas bibliotecas virtuais Lidos e Ficção Científica. O valor seguindo vl: deve ser o nome de uma biblioteca virtual. Se o nome da biblioteca virtual contiver espaços, coloque-o entre aspas.
Se um campo tem um valor
Você pode pesquisar a ausência ou presença de um valor para um campo usando “true” e “false”. Por exemplo:
cover:falseencontra todos os livros sem capa
series:trueencontra todos os livros que estão em uma série
series:falseencontra todos os livros que não estão em uma série
comments:falseencontra todos os livros com um comentário vazio
formats:falseencontra todos os livros sem arquivos de livro (registros vazios)
Colunas personalizadas Sim/não
Pesquisar colunas personalizadas Sim/não para false, empty ou blank encontrará todos os livros com valores indefinidos na coluna. Pesquisar por true encontrará todos os livros que não têm valores indefinidos na coluna. Pesquisar por yes ou checked encontrará todos os livros com Sim na coluna. Pesquisar por no ou unchecked encontrará todos os livros com Não na coluna. Observe que as palavras yes, no, blank, empty, checked e unchecked são traduzidas; você pode usar a palavra equivalente do idioma atual ou a palavra em inglês. As palavras true e false e os valores especiais _yes, _no e _empty não são traduzidos.
Identificadores
Identificadores (por exemplo, ISBN, DOI, LCCN, etc.) usam uma sintaxe estendida. Um identificador tem o formato tipo:valor, como em isbn:123456789. A sintaxe estendida permite que você especifique independentemente o tipo e o valor a serem pesquisados. Tanto o tipo quanto as partes de valor da consulta podem usar qualquer um dos tipos de pesquisa. Exemplos:
identifiers:trueencontrará livros com qualquer identificador.
identifiers:falseencontrará livros sem identificador.
identifiers:123pesquisará livros com qualquer tipo que tenha um valor contendo 123.
identifiers:=123456789pesquisará livros com qualquer tipo que tenha um valor igual a 123456789.
identifiers:=isbn:eidentifiers:isbn:trueencontrarão livros com um tipo igual a ISBN com qualquer valor
identifiers:=isbn:falseencontrará livros sem tipo igual a ISBN.
identifiers:=isbn:123encontrará livros com um tipo igual a ISBN com um valor contendo 123.
identifiers:=isbn:=123456789encontrará livros com um tipo igual a ISBN com um valor igual a 123456789.
identifiers:i:1encontrará livros com um tipo contendo um i com um valor contendo um 1.
Categorias visíveis no navegador de tags
A pesquisa in_tag_browser:true encontra todos os livros que estão em categorias (tags, autores, etc.) atualmente exibidas no Navegador de tags. Isso é útil se você definir as duas preferências Preferências → Aparência → Navegador de tags → Ocultar categorias vazias e Localizar mostra todos os itens correspondentes. Com essas duas preferências definidas, fazer um Localizar no Navegador de tags mostra apenas as categorias que contêm itens correspondentes ao Localizar. Então, a pesquisa in_tag_browser:true encontra adicionalmente livros com essas categorias/itens. Você pode executar esta pesquisa facilmente pressionando a tecla Ctrl+Alt+Shift+F ou clicando no botão configurar no Navegador de tags e escolhendo a entrada Mostrar apenas livros que têm categorias visíveis.
Pesquisar usando modelos
Você pode pesquisar usando um modelo em A linguagem padrão do calibre em vez de um campo de metadados. Para fazer isso, você insere um modelo, um tipo de pesquisa e o valor a ser pesquisado. A sintaxe é:
template: (the template) #@#: (search type) : (the value)
O modelo é qualquer modelo de linguagem de modelo calibre válido. O tipo de pesquisa deve ser um de t (pesquisa de texto), d (pesquisa de data), n (pesquisa numérica) ou b (definido/não definido (booleano)). O valor é o que você quiser e pode usar os tipos de pesquisa descritos acima para os vários tipos de pesquisa. Você deve colocar a string de pesquisa inteira entre aspas se houver espaços em qualquer lugar dela.
Exemplos:
template:"program: connected_device_name('main')#@#:t:kindle"– é verdadeiro quando o dispositivokindleestá conectado.
template:"program: select(formats_sizes(), 'EPUB')#@#:n:>1000000"– encontra livros com arquivos EPUB maiores que 1 MB.
template:"program: select(formats_modtimes('iso'), 'EPUB')#@#:d:>10daysago"– encontra livros com arquivos EPUB mais recentes que 10 dias atrás.
template:"""program: book_count('tags:^"' & $series & '"', 0) != 0#@#:n:1"""– encontra todos os livros que contêm o nome da série nas tags. Este exemplo usa super-aspas porque o modelo usa aspas simples (') e aspas duplas (") ao construir a expressão de pesquisa.
Você pode criar consultas de pesquisa de modelo facilmente usando a caixa de diálogo Pesquisa avançada acessada clicando no botão . Você pode testar modelos em livros específicos usando o Testador de modelo do calibre, que pode ser adicionado às barras de ferramentas ou menus por meio de Preferências → Barras de ferramentas e menus. Ele também pode ser atribuído a um atalho de teclado por meio de Preferências → Atalhos.
Caixa de diálogo de pesquisa avançada
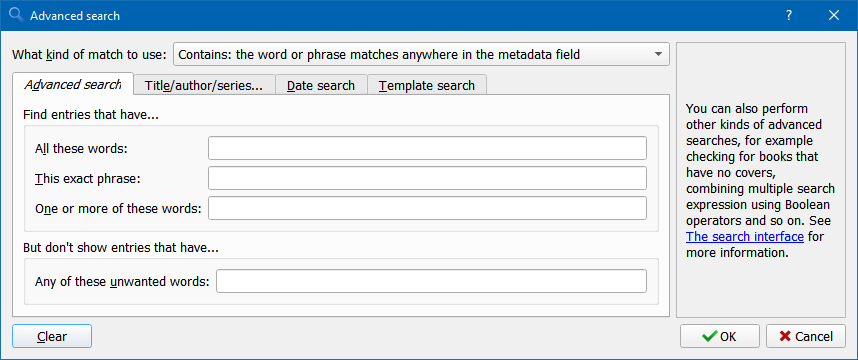
Caixa de diálogo de pesquisa avançada
Salvando pesquisas
o calibre permite que você salve uma pesquisa usada com frequência com um nome especial e, em seguida, reutilize essa pesquisa com um único clique. Para fazer isso, crie sua pesquisa digitando-a na barra de pesquisa ou usando o navegador de tags. Em seguida, digite o nome que deseja dar à pesquisa na caixa Pesquisas salvas ao lado da barra de pesquisa. Clique no ícone de mais ao lado da caixa de pesquisas salvas para salvar a pesquisa.
Agora você pode acessar sua pesquisa salva no navegador de tags em Pesquisas salvas. Um único clique permitirá que você reutilize qualquer pesquisa arbitrariamente complexa facilmente, sem precisar recriá-la.
Pesquisando o texto completo de todos os livros
 O calibre pode opcionalmente indexar o texto completo dos livros na biblioteca para permitir a pesquisa instantânea de palavras dentro de qualquer livro. Para usar esta funcionalidade, clique no botão FT na extremidade esquerda da barra de pesquisa.
Em seguida, ative a indexação para a biblioteca atual. Assim que a indexação for concluída, você poderá pesquisar todo o texto na biblioteca completa. Quando você adiciona novos livros à biblioteca, eles serão indexados automaticamente em segundo plano. Esta pesquisa permite que você encontre rapidamente todos os livros que contêm uma palavra ou combinação de palavras. Você pode até pesquisar palavras que ocorrem perto de outras palavras, conforme mostrado nos exemplos na janela pop-up de pesquisa. Observe que esta ferramenta de pesquisa encontrará apenas uma ocorrência da consulta de pesquisa em um livro específico, não listará todas as ocorrências, para isso é melhor pesquisar dentro do livro usando o Visualizador de e-books do calibre.
Você pode reindexar um livro individual clicando com o botão direito do mouse no Painel de detalhes do livro no calibre e escolhendo Reindexar este livro para pesquisa de texto completo.
Bibliotecas virtuais
Uma biblioteca virtual é uma maneira de fingir que sua biblioteca calibre tem apenas alguns livros em vez de sua coleção completa. Esta é uma excelente maneira de particionar sua grande coleção de livros em partes menores e gerenciáveis. Para aprender como criar e usar bibliotecas virtuais, consulte o tutorial: Bibliotecas virtuais.
Marcando livros temporariamente
Você pode marcar conjuntos arbitrários de livros temporariamente. Os livros marcados terão um alfinete sobre eles e podem ser encontrados com a pesquisa marked:true. Para marcar um livro, pressione Ctrl+M ou vá para Preferências → Barras de ferramentas e menus e adicione o botão Marcar livros à barra de ferramentas principal.
Você pode marcar livros com um rótulo de texto específico clicando com o botão direito do mouse no botão Marcar livros e escolhendo Marcar livros com rótulo de texto. Os livros marcados com rótulos de texto podem ser encontrados posteriormente usando a pesquisa marked:"=o-texto-que-você-inseriu".
Adivinhando metadados a partir de nomes de arquivo
Normalmente, o calibre lê os metadados de dentro do arquivo do livro. No entanto, ele pode ser configurado para ler os metadados do nome do arquivo, por meio de Preferências → Importar/exportar → Adicionar livros → Ler metadados do conteúdo do arquivo.
Você também pode controlar como os metadados são lidos do nome do arquivo usando expressões regulares (consulte Tudo sobre como usar expressões regulares no calibre). Na seção Adicionando livros da caixa de diálogo de configuração, você pode especificar uma expressão regular que o calibre usará para tentar adivinhar os metadados a partir dos nomes dos arquivos de e-book que você adiciona à biblioteca. A expressão regular padrão é:
title - author
ou seja, assume que todos os caracteres até o primeiro - são o título do livro e os caracteres subsequentes são o autor do livro. Por exemplo, o nome do arquivo:
Foundation and Earth - Isaac Asimov.txt
será interpretado como tendo o título: Fundação e Terra e autor: Isaac Asimov
Dica
Se o nome do arquivo não contiver o hífen, a expressão regular acima falhará.
Detalhes do livro
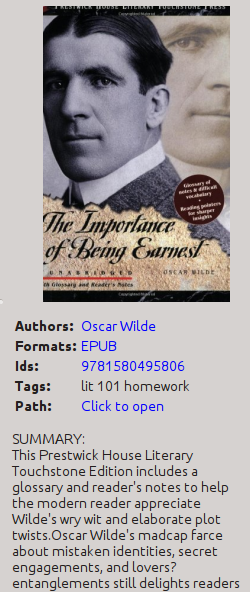
A exibição Detalhes do livro mostra a capa e todos os metadados do livro atualmente selecionado. Ele pode ser ocultado por meio do botão Layout no canto inferior direito da janela principal do calibre. Os nomes dos autores mostrados no painel Detalhes do livro podem ser clicados, eles o levarão por padrão para a página da Wikipedia do autor. Isso pode ser personalizado clicando com o botão direito do mouse no nome do autor e selecionando Gerenciar este autor.
Da mesma forma, se você baixar metadados para o livro, o painel Detalhes do livro mostrará automaticamente links apontando para as páginas da Web do livro na Amazon, WorldCat, etc. de onde os metadados foram baixados.
Você pode clicar com o botão direito do mouse em formatos individuais de e-book no painel Detalhes do livro para excluí-los, compará-los com suas versões originais, salvá-los no disco, abri-los com um programa externo, etc.
Você pode alterar a capa do livro simplesmente arrastando e soltando uma imagem no painel Detalhes do livro. Se desejar editar a imagem da capa em um programa externo, basta clicar com o botão direito do mouse nela e escolher Abrir com.
Você também pode adicionar arquivos de e-book ao livro atual arrastando e soltando os arquivos no painel Detalhes do livro.
Clicar duas vezes no painel Detalhes do livro abrirá em uma janela pop-up separada.
Por fim, você pode personalizar exatamente quais informações são exibidas no painel Detalhes do livro por meio de Preferências → Interface → Aparência → Detalhes do livro.
Navegador de tags
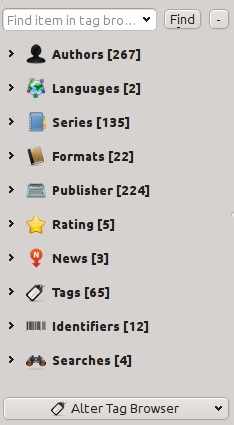
O Navegador de tags permite que você navegue facilmente por sua coleção por Autor/Tags/Série/etc. Se você clicar em qualquer item no Navegador de tags, por exemplo, o nome do autor Isaac Asimov, a lista de livros à direita será restrita a mostrar livros desse autor. Você também pode clicar em nomes de categorias. Por exemplo, clicar em “Série” mostrará todos os livros em qualquer série.
O primeiro clique em um item restringirá a lista de livros àqueles que contêm ou correspondem ao item. Continuando o exemplo acima, clicar em Isaac Asimov mostrará os livros desse autor. Clicar novamente no item mudará o que é mostrado, dependendo se o item tem filhos (consulte subcategorias e itens hierárquicos abaixo). Continuando o exemplo de Isaac Asimov, clicar novamente em Isaac Asimov restringirá a lista de livros àqueles que não são de Isaac Asimov. Um terceiro clique removerá a restrição, mostrando todos os livros. Se você mantiver pressionadas as teclas Ctrl ou Shift e clicar em vários itens, serão criadas restrições com base em vários itens. Por exemplo, você pode manter pressionada a tecla Ctrl e clicar nas tags História e Europa para encontrar livros sobre história europeia. O Navegador de tags funciona construindo expressões de pesquisa que são inseridas automaticamente na barra de pesquisa. Observar o que o Navegador de tags gera é uma boa maneira de aprender a construir expressões de pesquisa básicas.
Os itens no Navegador de tags têm seus ícones parcialmente coloridos. A quantidade de cor depende da classificação média dos livros nessa categoria. Então, por exemplo, se os livros de Isaac Asimov tiverem uma média de quatro estrelas, o ícone de Isaac Asimov no Navegador de tags terá 4/5 coloridos. Você pode passar o mouse sobre o ícone para ver a classificação média.
Os itens de nível externo no Navegador de tags, como Autores e Séries, são chamados de categorias. Você pode criar suas próprias categorias, chamadas de Categorias do usuário, que são úteis para organizar itens. Por exemplo, você pode usar o Editor de categorias do usuário (clique no botão Configurar no canto inferior esquerdo do Navegador de tags e escolha Gerenciar autores, tags, etc. → Categorias do usuário) para criar uma categoria de usuário chamada Autores favoritos, em seguida, coloque os itens de seus favoritos na categoria. As categorias de usuário podem ter subcategorias. Por exemplo, a categoria de usuário Favoritos.Autores é uma subcategoria de Favoritos. Você também pode ter Favoritos.Séries, nesse caso haverá duas subcategorias em Favoritos. As subcategorias podem ser criadas clicando com o botão direito do mouse em uma categoria de usuário, escolhendo Adicionar subcategoria a… e inserindo o nome da subcategoria; ou usando o Editor de categorias do usuário inserindo nomes como o exemplo de Favoritos acima.
- Você pode pesquisar categorias de usuário da mesma forma que categorias integradas, clicando nelas. Existem quatro pesquisas diferentes percorridas clicando:
“tudo que corresponde a um item na categoria” indicado por um único sinal de mais verde.
“tudo que corresponde a um item na categoria ou suas subcategorias” indicado por dois sinais de mais verdes.
“tudo que não corresponde a um item na categoria” mostrado por um único sinal de menos vermelho.
“tudo que não corresponde a um item na categoria ou suas subcategorias” mostrado por dois sinais de menos vermelhos.
Também é possível criar hierarquias dentro de algumas das categorias de texto, como tags, séries e colunas personalizadas. Essas hierarquias são mostradas com o pequeno triângulo, permitindo que os subitens sejam ocultados. Para usar hierarquias de itens em uma categoria, você deve primeiro ir para Preferências → Interface → Aparência e inserir o(s) nome(s) da categoria no campo “Categorias com itens hierárquicos”. Feito isso, os itens dessa categoria que contêm pontos serão mostrados usando o pequeno triângulo. Por exemplo, suponha que você crie uma coluna personalizada chamada “Gênero” e indique que ela contém itens hierárquicos. Feito isso, itens como Mistério.Suspense e Mistério.Inglês serão exibidos como Mistério com o pequeno triângulo ao lado. Clicar no triângulo mostrará Suspense e Inglês como subitens. Consulte Gerenciando subgrupos de livros, por exemplo “gênero” para obter mais informações.
Itens hierárquicos (itens com filhos) usam as mesmas quatro pesquisas ‘clicar em’ que as categorias de usuário. Os itens que não têm filhos usam duas das pesquisas: “tudo que corresponde” e “tudo que não corresponde”.
Você pode arrastar e soltar itens no Navegador de tags em categorias de usuário para adicioná-los a essa categoria. Se a origem for uma categoria de usuário, manter pressionada a tecla Shift enquanto arrasta moverá o item para a nova categoria. Você também pode arrastar e soltar livros da lista de livros em itens no Navegador de tags; soltar um livro em um item faz com que esse item seja aplicado automaticamente aos livros soltos. Por exemplo, arrastar um livro para Isaac Asimov definirá o autor desse livro como Isaac Asimov. Soltá-lo na tag História adicionará a tag História às tags do livro.
Você pode encontrar facilmente qualquer item no Navegador de tags clicando no botão de pesquisa no canto inferior direito. Além disso, você pode clicar com o botão direito do mouse em qualquer item e escolher uma das várias operações. Alguns exemplos são ocultá-lo, renomeá-lo ou abrir uma caixa de diálogo “Gerenciar x” que permite gerenciar itens desse tipo. Por exemplo, a caixa de diálogo Gerenciar autores permite que você renomeie autores e controle como seus nomes são classificados.
Você pode controlar como os itens são classificados no Navegador de tags por meio do botão Configurar no canto inferior esquerdo do Navegador de tags. Você pode optar por classificar por nome, classificação média ou popularidade (popularidade é o número de livros com um item em sua biblioteca; por exemplo, a popularidade de Isaac Asimov é o número de livros em sua biblioteca de Isaac Asimov).
You can use your own icons for categories and values in categories. To change the icon for a category, right-click on the category (the outer-level item) and choose Change (category name) category icon. A dialog will open where you can pick an image to be used as the icon. To restore the icon to its default choose Restore (category name) default icon.
To choose icons for values in categories, right-click on a value then choose Manage icon for (value name). You will see a list of choices:
Choose an icon for this value but not its children. A dialog will open where you choose an icon for the value. Children of that value will not inherit that icon.
Choose an icon for this value and its children. A dialog will open where you choose an icon for the value. Any children that don’t have their own specified icon will inherit this icon.
Use the existing icon for this value but not its children. This option is offered if the value already has an icon that is inherited by the value’s children. Selecting it will make the icon apply to the value but not its children.
Use the existing icon for this value and its children. This option is offered if the value already has an icon that is not inherited by the value’s children. Selecting it will make the icon apply to the value and its children.
Use the default icon for this value. This option is offered if the item has an icon. It removes the icon from the value and any children inheriting the icon. The default icon is what is specified below.
Reset all value icons to the default icon. This option removes all item value icons for the category. It does not remove a template if one exists. There is no undo.
Use/edit a template to choose the default value icon. This option permits you to provide a calibre template that returns the name of an icon file to be used as a default icon. The template can use the following variables:
category: the lookup name of the category, for exampleauthors,series,#mycolumn.value: the value of the item within the category.count: the number of books with this value. If the value is part of a hierarchy then the count includes the children.avg_rating: the average rating for books with this value. If the value is part of a hierarchy then the average includes the children.
Book metadata such as title is not available. Template database functions such as book_count and book_values will work, but the performance might not be acceptable. The following template functions will work in the GUI but won’t work in the content server: connected_device_name, connected_device_uuid, current_virtual_library_name, is_marked, and virtual_libraries.
In the GUI, Python templates have full access to the calibre database. In the content server, Python templates have access to new API (see API documentation for the database interface) but not the old API (LibraryDatabase).
For example, this template specifies that any value in the clicked-on category beginning with History will have an icon named
flower.png:program: if substr($value, 0, 7) == 'History' then 'flower.png' fi
If a template returns the empty string (
'') then the category icon will be used. If the template returns a file name that doesn’t exist then no icon is displayed.Use the category icon as the default. This option specifies that the icon used for the category should be used for any value that doesn’t otherwise have an icon. Selecting this option removes any template icon specification.
The icon is chosen using the following hierarchy:
The icon specified for the value, if it exists.
The icon specified for a parent node found by walking up the tree, if one exists.
The icon from a template, if a template exists and it returns a non-empty string.
The default category icon, which always exists.
Icons are per-user, not per-library, stored in the calibre configuration folder. Icons for item values are stored in the tb_icons subfolder. Icons used by templates are in the template_icons subfolder of tb_icons.
Grade de capas

Você pode fazer com que o calibre exiba uma grade de capas de livros em vez de uma lista de livros, se preferir navegar por sua coleção por capas. A Grade de capas é ativada clicando no botão Layout no canto inferior direito da janela principal do calibre. Você pode personalizar os tamanhos das capas e o plano de fundo da Grade de capas por meio de Preferências → Interface → Aparência → Grade de capas. Você pode até fazer com que o calibre exiba qualquer campo especificado sob as capas, como título ou autores ou classificação ou uma coluna personalizada de sua própria criação.
Visualização como estante de livros
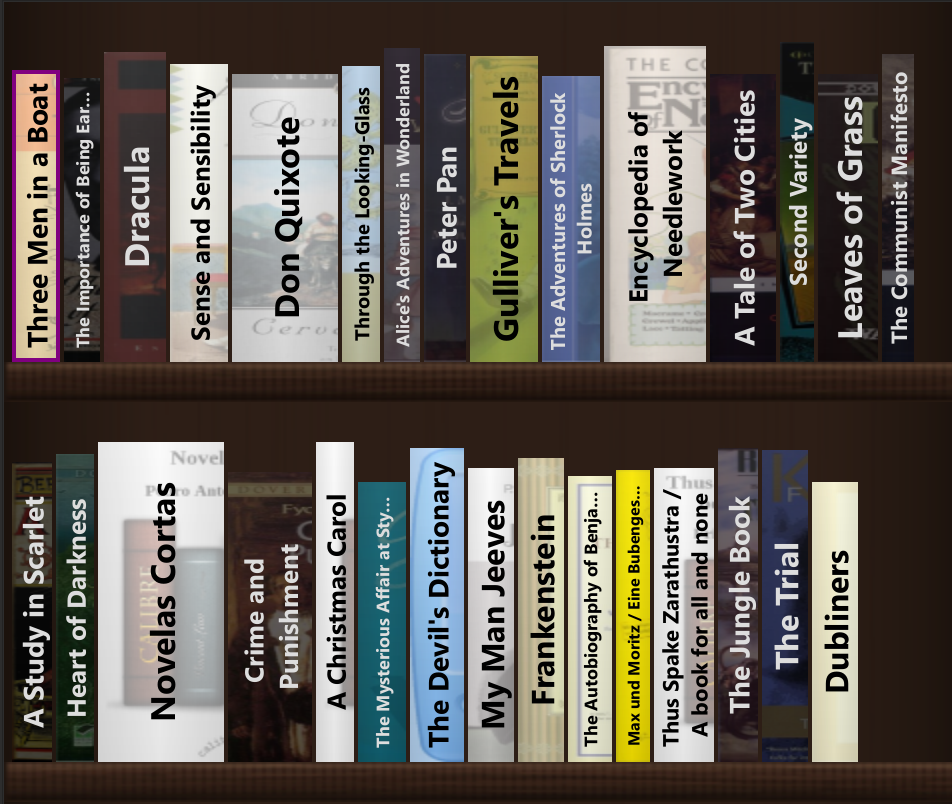
You can have calibre display your book collection in shelves, optionally grouped by authors/date/rating etc. The Bookshelf view is activated by clicking the Layout button in the bottom right corner of the main calibre window. You can customize everything about the view from the background, to the text on the spines, the fonts, et cetera via Preferences → Interface → Look & feel → Bookshelf.
Navegador de capas
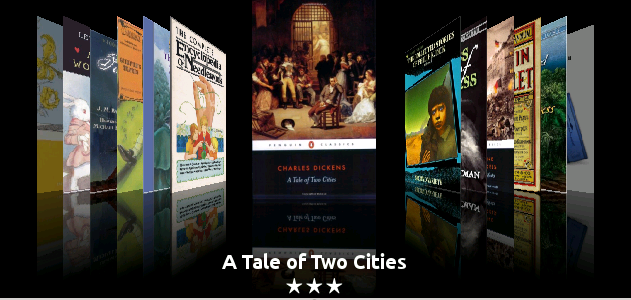
In addition to the Cover grid described above, you can also have calibre display covers in a single row. This is activated via the Layout button in the lower right corner of the main window. In Preferences → Interface → Look & feel → Cover browser you can change the number of covers displayed, and even have the Cover browser display itself in a separate popup window.
Adicionando notas para autores, séries, etc.
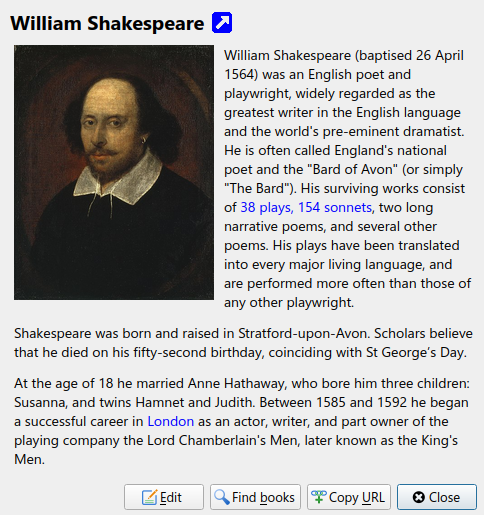
Você pode adicionar notas para um autor/série/tag/editora/etc. à sua biblioteca calibre. Para fazer isso, clique com o botão direito do mouse no nome do autor no Navegador de tags à esquerda ou no painel Detalhes do livro à direita e escolha Criar nota ou Editar nota.
Uma janela pop-up simples permitirá que você insira suas notas usando formatação básica e suportando links e imagens. Depois que uma nota para um autor é criada, ela pode ser visualizada facilmente no painel Detalhes do livro clicando no pequeno ícone de lápis ao lado do nome do autor.
Você pode pesquisar em todas as notas em sua biblioteca usando a ferramenta Navegar pelas notas pressionando Ctrl+Shift+N ou adicionando-a à barra de ferramentas por meio de Preferências → Barras de ferramentas e menus.
Visualização rápida
Sometimes you want to select a book and quickly get a list of books with the same value in some category (authors, tags, publisher, series, etc.) as the currently selected book, but without changing the current view of the library. You can do this with Quickview. Quickview opens either a second window or a panel in the book list showing the list of books matching the value of interest. For example, assume you want to see a list of all the books with one or more of the authors of the currently-selected book. Click in the author cell you are interested in and press the ‘Q’ key or click the Quickview icon in the Layout section of the calibre window. A window or panel will open with all the authors for that book on the left, and all the books by the selected author on the right.
- Alguns exemplos de uso da Visualização rápida: ver rapidamente quais outros livros:
têm alguma(s) tag(s) aplicada(s) ao livro atualmente selecionado,
estão na mesma série que o livro atual
têm os mesmos valores em uma coluna personalizada que o livro atual
são escritos por um dos mesmos autores do livro atual
compartilham valores em uma coluna personalizada
Existem duas opções para onde as informações da Visualização rápida aparecem:
Ele pode abrir “desancorado”: sobre a janela calibre e permanecerá aberto até que você o feche explicitamente.
Ele pode abrir “ancorado”: como um painel na seção da lista de livros da janela principal do calibre.
Você pode mover a janela de ancorada para desancorada conforme desejado usando o botão “Ancorar/Desancorar”.
The Quickview panel can be left open permanently, in which case it follows movements on the book list. For example, if you click in the calibre library view on a category column (tags, series, publisher, authors, etc.) for a book, the Quickview window contents will change to show you in the left-hand side panel the values in that category for the selected book (e.g., the tags for that book). The first item in that list will be selected, and Quickview will show you on the right-hand side panel all the books in your library that use that value. Click on a different value in the left-hand panel to see the books with that different value.
Clique duas vezes em um livro na janela Visualização rápida para selecionar esse livro na visualização da biblioteca. Isso também mudará a exibição dos itens na janela Visualização rápida (o painel do lado esquerdo) para mostrar os itens no livro recém-selecionado.
Clique duas vezes em um livro na janela Visualização rápida com Shift- ou Ctrl- pressionado para abrir a caixa de diálogo editar metadados desse livro na janela calibre. O livro editado será visualizado rapidamente quando você fechar a caixa de diálogo editar metadados.
You can see if a column can be Quickview’ed by hovering your mouse over the column heading and looking at the tooltip for that heading. You can also know by right-clicking on the column heading to see if the “Quickview” option is shown in the menu, in which case choosing that Quickview option is equivalent to pressing ‘Q’ in the current cell.
Opções (em Preferências → Aparência → Visualização rápida):
Respeitar (ou não) a biblioteca virtual atual. Se marcado, a Visualização rápida mostra apenas os livros na biblioteca virtual atual. Padrão: respeitar bibliotecas virtuais
Alterar o conteúdo da janela Visualização rápida quando a coluna for alterada na lista de livros usando as teclas do cursor. Padrão: não seguir alterações feitas com as teclas do cursor
Alterar a coluna sendo “visualizada rapidamente” quando uma célula na janela Visualização rápida for clicada duas vezes. Caso contrário, o livro é alterado, mas a coluna que está sendo examinada não. Padrão: alterar a coluna
Alterar a coluna sendo “visualizada rapidamente” para a coluna atual quando a tecla Enter for pressionada no painel Visualização rápida. Caso contrário, o livro é alterado, mas a coluna que está sendo examinada não. Padrão: alterar a coluna
Escolha quais colunas são mostradas na janela/painel Visualização rápida.
Tarefas

O painel Tarefas mostra o número de tarefas em execução no momento. As tarefas são processos que são executados em um processo separado. Eles incluem a conversão de e-books e a comunicação com o dispositivo do leitor. Você pode clicar no painel de tarefas para acessar a lista de tarefas. Depois que uma tarefa for concluída, você pode ver um log detalhado dessa tarefa clicando duas vezes nela na lista. Isso é útil para depurar tarefas que podem não ter sido concluídas com sucesso.
Atalhos de teclado
o calibre possui vários atalhos de teclado para economizar tempo e movimento do mouse. Esses atalhos estão ativos na visualização da lista de livros (quando você não está editando os detalhes de um livro específico) e a maioria deles afeta o título que você selecionou. O Visualizador de e-books do calibre possui seus próprios atalhos que podem ser personalizados nas Preferências do visualizador.
Nota
Observação: os atalhos de teclado do calibre não exigem uma tecla modificadora (Command, Option, Control, etc.), a menos que seja especificamente observado. Você só precisa pressionar a tecla da letra, por exemplo, E para editar.
Atalho de teclado |
Ação |
|---|---|
F2 (Enter para macOS) |
Editar os metadados do campo atualmente selecionado na lista de livros. |
A |
Adicionar livros |
Shift+A |
Adicionar formatos aos livros selecionados |
C |
Converter livros selecionados |
D |
Enviar para o dispositivo |
Del |
Remover livros selecionados |
E |
Editar metadados de livros selecionados |
G |
Obter livros |
I |
Mostrar detalhes do livro |
K |
Editar Índice |
M |
Mesclar registros selecionados |
Alt+M |
Mesclar registros selecionados, mantendo os originais |
O |
Abrir conteúdo da pasta |
P |
Polir livros |
S |
Salvar no disco |
T |
Editar livro |
V |
Visualizar |
Shift+V |
Visualizar último livro lido |
Ctrl+Alt+A |
Ask AI about the currently selected books |
Alt+V/Cmd+V para macOS |
Visualizar formato específico |
Alt+Shift+J |
Alternar lista de tarefas |
Alt+Shift+B |
Alternar Navegador de capas |
Alt+Shift+D |
Alternar painel de detalhes do livro |
Alt+Shift+T |
Alternar Navegador de tags |
Alt+Shift+G |
Alternar Grade de capas |
Alt+Shift+H |
Toggle Bookshelf |
Alt+A |
Mostrar livros do mesmo autor do livro atual |
Alt+T |
Mostrar livros com as mesmas tags do livro atual |
Alt+P |
Mostrar livros da mesma editora do livro atual |
Alt+Shift+S |
Mostrar livros da mesma série do livro atual |
/, Ctrl+F |
Focar na barra de pesquisa |
Shift+Ctrl+F |
Abrir a caixa de diálogo de pesquisa avançada |
Shift+Alt+F |
Alternar a barra de pesquisa |
Esc |
Limpar a busca atual |
Shift+Esc |
Focar a lista de livros |
Ctrl+Esc |
Limpar a biblioteca virtual |
Alt+Esc |
Limpar a restrição adicional |
Ctrl+* |
Criar uma biblioteca virtual temporária com base na pesquisa atual |
Ctrl+Tab |
Selecionar a próxima guia da biblioteca virtual |
Ctrl+Shift+Tab |
Selecionar a guia anterior da biblioteca virtual |
N ou F3 |
Encontrar o próximo livro que corresponde à pesquisa atual (só funciona se o realce da pesquisa estiver ativado nas preferências de pesquisa) |
Shift+N ou Shift+F3 |
Encontrar o livro anterior que corresponde à pesquisa atual (só funciona se o realce da pesquisa estiver ativado nas preferências de pesquisa) |
Ctrl+D |
Baixar metadados e capas |
Ctrl+R |
Reiniciar o calibre |
Ctrl+Shift+R |
Reiniciar o calibre em modo de depuração |
Shift+Ctrl+E |
Adicionar livros vazios para o calibre |
Ctrl+M |
Alternar status marcado/desmarcado em livros selecionados |
Ctrl+/ ou Ctrl+Alt+F |
Abrir o pop-up para pesquisar o texto completo de todos os livros da biblioteca |
Q |
Abrir o pop-up Visualização rápida para visualizar livros em séries/tags/etc. relacionados. |
Shift+Q |
Focar no painel Visualização rápida aberto |
Shift+S |
Realizar uma pesquisa no painel Visualização rápida |
F5 |
Reaplicar a classificação atual |
Ctrl+Q |
Encerrar o calibre |
X |
Alternar rolagem automática da lista de livros |
Ctrl+Alt+Shift+F |
Restringir os livros exibidos apenas aos livros que estão em uma categoria atualmente exibida no Navegador de tags |
B |
Navegar pelas notas (destaques e marcações) feitas pelo visualizador de E-book do calibre para todos os livros na biblioteca |
Ctrl+Shift+N |
Navegar pelas notas associadas a autores/séries/tags/etc. |
Alt+Shift+L |
Alternar o layout entre visualizações amplas e estreitas |
Ctrl+Alt+P |
Switch to previous library, if any |
Ctrl+Alt+Shift+P |
Switch to previous virtual library, if any |